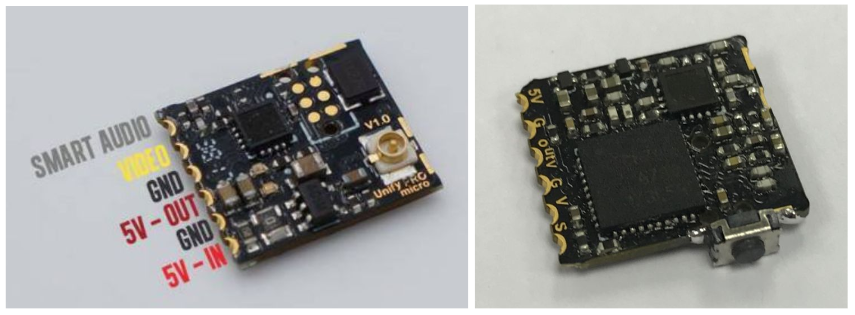
TBS NANO (VTX and RX) pinout
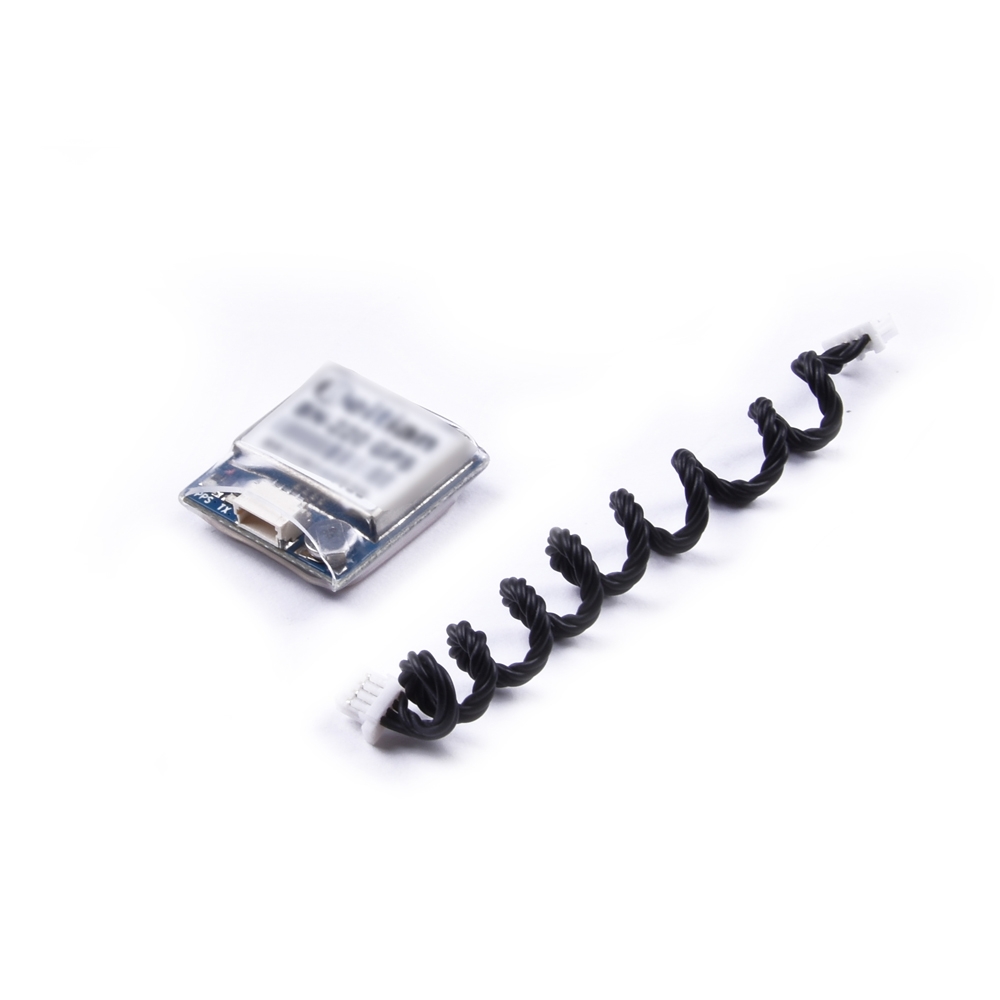
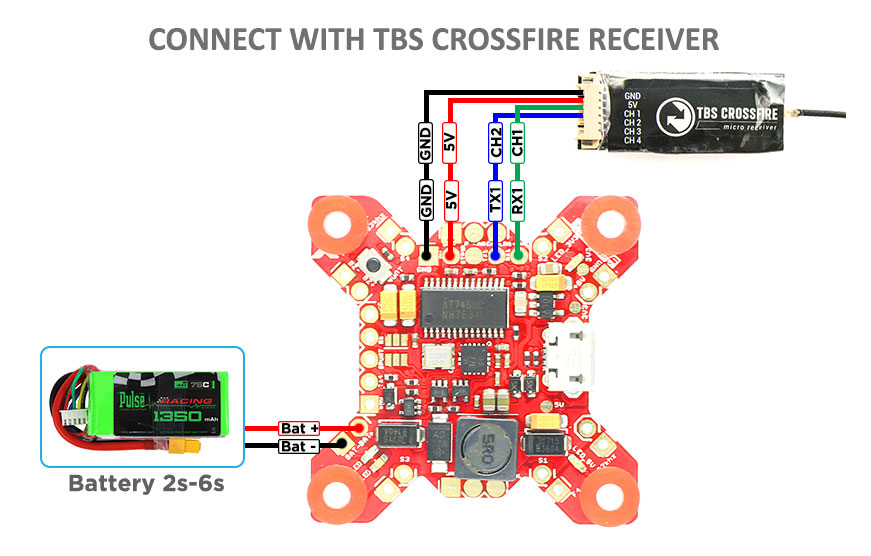
Wiring TBS Crossfire NANO receiver
The receiver does not come with any connectors on-board, this is with intention to allow for flexible and more varied setups, i.e. it is easier to add a connector than to remove a pre-soldered one.
Use normal servo-wires to either connect directly to the soldering pads/vias or use pin header to mount it to a motherboard. The antenna uses a U.FL connector. Use heat-shrink tubing to protect the receiver.
Binding

Binding the transmitter and receiver is super simple.
- Just power up the TBS CROSSFIRE transmitter
- On the standard transmitter, enter the configuration menu by pressing and holding the joystick for 3 seconds, select “General” and “Binding” - a message “Binding” will start blinking, waiting for the receiver. On the micro transmitter, a short press on the button will initiate binding mode.
- Now, power up the receiver (without pressing the Bind button!), if your receiver has not been previously bound, it will automatically bind. Otherwise, press and release the “BIND” button on the receiver to initiate binding. On the receiver is a timeout of one minute for after power up to enter bind mode. If the status LED will start blinking slowly the receiver has switched successfully to bind mode.
- Within a few seconds the process will finish with a “Binding complete” message on the standard transmitter, or a solid green LED on the micro transmitter. The receiver has now stored the unique serial number of that particular CROSSFIRE transmitter. If it doesn’t bind, please verify that your firmware is to the newest version on both the receiver and the transmitter.
Video transmitter TBS unify NANO pinout